OS X Mavericks Server - Setting Up Caching Server
The Caching Server in OS X Mavericks Server is used to speed up downloads of content distributed by Apple over the internet. Caching Server caches all updates, App Store and iBooks downloads, and Internet Recovery software that your OS X v10.8.2+ and iOS 7 devices download.
Contents
- Shared Caching Over Subnets
- Peer Review
- Monitoring

Caching Server 2 which came out with OS X Mavericks Server raised the bar from Caching Server in OS X Mountain Lion Server by adding software updates, iOS app updates, iBooks and Internet Recovery downloads. Also added is the support for multiple Caching Server 2 servers on the same public IP network. If there are multiple Caching Servers on the same network and one doesn’t contain a requested download, the Caching Server will consult with its peer servers on the same network to see if they have the requested download. This information is then passed onto the client, that will then select the right server automatically.
One important thing to note is that from OS X v10.8.2, Caching Server will do all software updates for clients, this doesn’t necessarily mean it can replace the Software Update Server that has been with OS X Server for a long time. Even though Software Update Server does require more maintenance and client configuration (you have to configure each client), you still maintain control over which clients get which updates. Caching Server 2 does not have the ability to deny updates for any devices. Maybe that will be added in the future, but for now if you need to control who gets what update, Caching Server 2 is not for you.
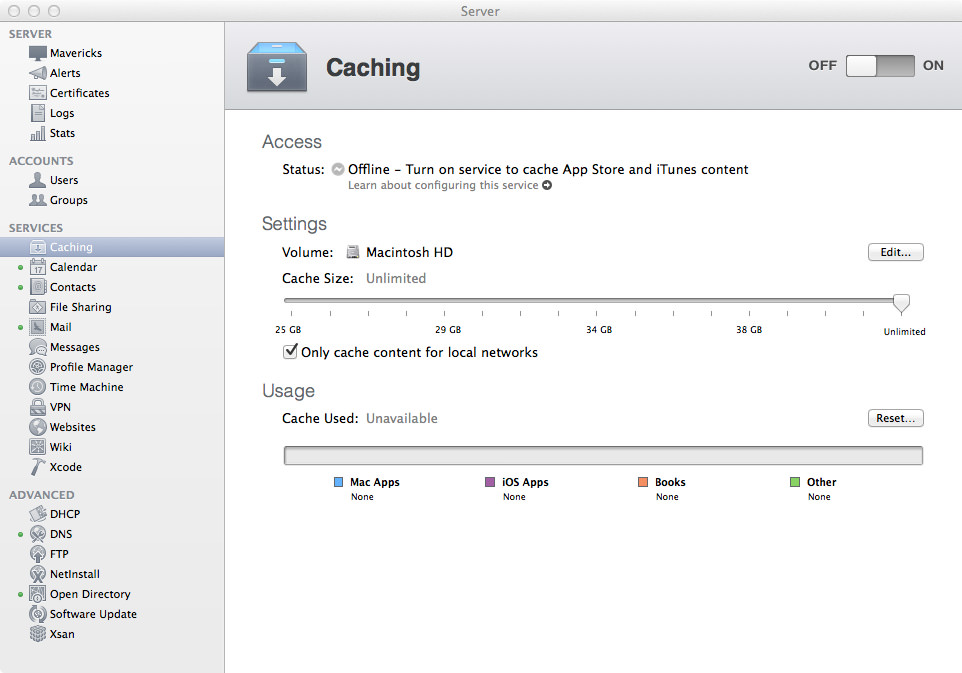
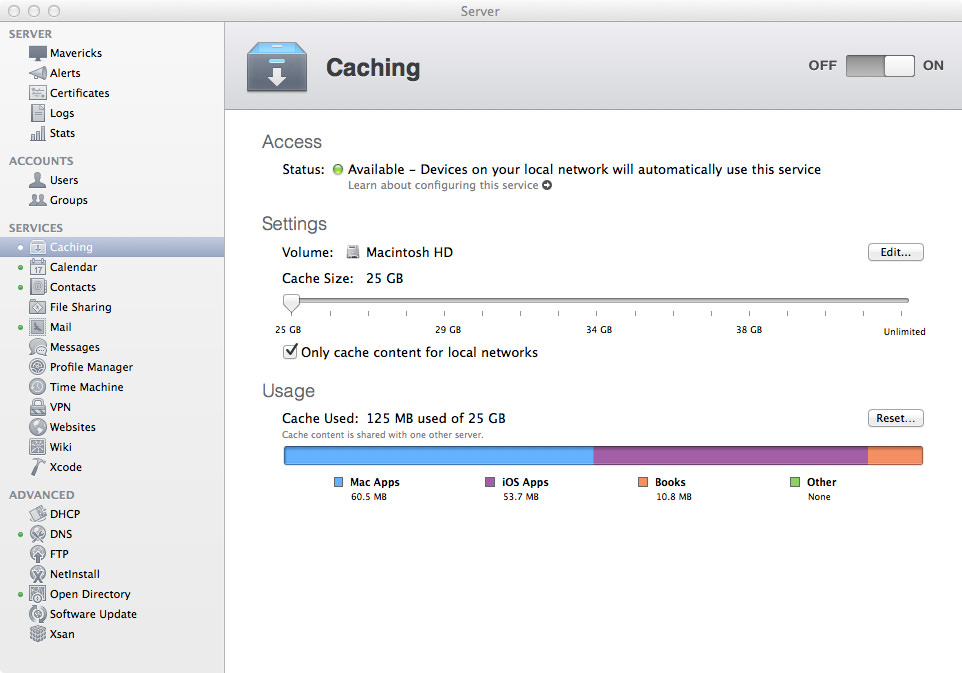
Okay, enough chit-chatter, let’s get Caching Server 2 running! Open the Server app then click on the section named Caching. Depending on your requirements, you might want to store all the downloads on a separate drive that’s connected to the server. I usually configure servers with small SSD boot drives, so storing Caching Server 2 downloads on a small SSD is not an option. Once you’ve chosen your storage device, you can now select the maximum cache size for Caching Server 2. There’s only one rule with Caching Server 2 storage, the minimum storage size is 25GB. Caching Server 2 has a buffer of 25GB where the least-used content is deleted to make way for more popular and requested downloads. We’re now ready to start the caching server! Hit the On button in the top-right corner.

After Caching Server 2 has started, try going to the App Store and downloading a few apps, and iBooks to download a few books. Check back in a few minutes to see your Usage graph, it should now be populated with details of the usage split, with detailed numbers of how much each cache category is using. Another way to check out how Caching Server 2 is going is by using Terminal! Open up Terminal and enter the following command:
sudo serveradmin fullstatus caching
You should see something like below:
caching:Active = yes
caching:state = "RUNNING"
caching:CacheUsed = 125027720
caching:Port = 61090
caching:TotalBytesRequested = 124886938
caching:RegistrationStatus = 1
caching:CacheLimit = 25000000000
caching:CacheFree = 4025427456
caching:Peers = _empty_array
caching:TotalBytesFromPeers = 0
caching:StartupStatus = "OK"
caching:TotalBytesFromOrigin = 124886938
caching:CacheStatus = "OK"
caching:TotalBytesReturned = 124886938
caching:CacheDetails:_array_index:0:BytesUsed = 60543656
caching:CacheDetails:_array_index:0:LocalizedType = "Mac Apps"
caching:CacheDetails:_array_index:0:MediaType = "Mac Apps"
caching:CacheDetails:_array_index:0:Language = "en"
caching:CacheDetails:_array_index:1:BytesUsed = 53730125
caching:CacheDetails:_array_index:1:LocalizedType = "iOS Apps"
caching:CacheDetails:_array_index:1:MediaType = "iOS Apps"
caching:CacheDetails:_array_index:1:Language = "en"
caching:CacheDetails:_array_index:2:BytesUsed = 10753939
caching:CacheDetails:_array_index:2:LocalizedType = "Books"
caching:CacheDetails:_array_index:2:MediaType = "Books"
caching:CacheDetails:_array_index:2:Language = "en"
caching:CacheDetails:_array_index:3:BytesUsed = 0
caching:CacheDetails:_array_index:3:LocalizedType = "Movies"
caching:CacheDetails:_array_index:3:MediaType = "Movies"
caching:CacheDetails:_array_index:3:Language = "en"
caching:CacheDetails:_array_index:4:BytesUsed = 0
caching:CacheDetails:_array_index:4:LocalizedType = "Music"
caching:CacheDetails:_array_index:4:MediaType = "Music"
caching:CacheDetails:_array_index:4:Language = "en"
caching:CacheDetails:_array_index:5:BytesUsed = 0
caching:CacheDetails:_array_index:5:LocalizedType = "Other"
caching:CacheDetails:_array_index:5:MediaType = "Other"
caching:CacheDetails:_array_index:5:Language = "en"
When your caching server first connects to Apple’s servers to let them know we have set up a caching server, it is assigned a GUID that other peers and clients can use to identify the server. To obtain this GUID you can enter the following into Terminal:
sudo serveradmin settings caching:ServerGUID
Shared Caching Over Subnets
A nifty feature is the ability for the caching server to traverse across subnets to share cached downloads. This feature is enabled by unticking the “Only cache content for local networks”. By default, Caching Server will only cache content for the current subnet (in my case, 10.1.125.0-10.1.125.255). An alternative way to enable multi-subnet caching through Terminal is to alter the LocalSubnetsOnly option, do this command to enable subnet traversal:
sudo serveradmin settings caching:LocalSubnetsOnly = no
This change doesn’t require a reboot of the Caching Server, but reboot just to make sure. If you want to disable subnet traversal, do this:
sudo serveradmin settings caching:LocalSubnetsOnly = yes
Those changes that you make will be reflected in the logs. If you take a look in the Debug.log (located at /Library/Server/Caching/Logs/Debug.log) you’ll see something like this:
2013/10/31 18:09:36:979  Registering with local address: 10.1.125.254; local subnet range only: 10.1.125.0-10.1.125.255
2013/10/31 18:09:38:284  Request for registration from https://lcdn-registration.apple.com/lcdn/register succeeded
2013/10/31 18:09:38:284  Got back public IP xx.xx.xxx.xx
2013/10/31 18:09:38:288  This server has 0 peer(s)
This feature requires you to be using Network Address Translation (NAT) and the same public IP address - both requirements of Apple. If you have multiple subnets if your office or workplace but only have the resources for one Caching Server, it would be wise to enable this feature on the server. Also make sure your firewall will allow traffic over port 61090/TCP for internal traffic only (this port may need to be changed if you specified a custom port when configuring caching server, or if you have multiple caching servers). If you don’t know what port your Caching Server is available at, you can enter this command to find out:
serveradmin fullstatus caching | grep "Port"
In most cases you should have 61090 returned. Generally, the only time this will be different is if you have multiple caching servers (see below) in the one workplace.
If you have a look at the settings for Caching Server in Terminal, you’ll see that the Caching Server port is set to 0. This means that when it starts up it’ll check for an available port on startup and choose an appropriate one (I presume this is defined when it registers with Apple). For example: if Caching Server was hard-wired to start on 61090, some of your machines or firewall may detect conflicts. Otherwise, you can hard-code a port for it to run on by firstly shutting down the Caching Server in the Server app, or in Terminal by entering sudo serveradmin stop caching. Next, decide on a port that you know to be available. As far as I can tell any port is okay, as long as it’s not already in use on the LAN. If I wanted to specify the Caching Server to run on 61000 I would enter this into Terminal:
sudo serveradmin settings caching:Port = 61000
Hit return then start Caching Server either in the Server app or by entering sudo serveradmin start caching. Give the Caching Server a few seconds to start, then enter sudo serveradmin fullstatus caching. I’ll trim the output, but the line you’re looking for should now show this:
caching:Port = 61000
Huzzah! Your Caching Server is now running on your custom port. Change it back to 0 if you want it to randomise the port on registration. Note that changing it back to default may not take into effect straight away, you may have to reboot Caching Server after a little while as Caching Server will cache registration settings, along with its last port (found with defaults read /Library/Server/Caching/Config/Config.plist LastPort). I’ve also updated the Nagios script for checking Caching Server to include port-specific checks, check it out!.
Peer Review
I really like the idea of a peer-based system with Caching Server 2 so I decided to spin up another OS X Mavericks Server instance and get it set up with Caching Server 2 also. After getting them both registered with Apple’s backend system (an automated process by the way, and should only take 2 minutes for each machine), I ran sudo serveradmin fullstatus caching on both machines so I could check out what the caching:Peers array would hold. Here are my results:
mavericks.pretendco.com - 10.1.125.120:
caching:Peers:_array_index:0:guid = "7B4E17C1-14E2-48E0-8062-34660B4C041B"
caching:Peers:_array_index:0:version = "73"
caching:Peers:_array_index:0:healthy = yes
caching:Peers:_array_index:0:address = "10.1.125.121"
caching:Peers:_array_index:0:port = 50294
replica.pretendco.com - 10.1.125.121:
caching:Peers:_array_index:0:guid = "8594F0EF-E810-4993-A74F-A1473C6B099D"
caching:Peers:_array_index:0:version = "73"
caching:Peers:_array_index:0:healthy = yes
caching:Peers:_array_index:0:address = "10.1.125.120"
caching:Peers:_array_index:0:port = 49486
On each machine you can also enter sudo serveradmin fullstatus caching | grep TotalBytesFromPeers and sudo serveradmin fullstatus caching | grep TotalBytesFromOrigin to get the number of bytes transferred from peers and origin respectively. I noticed a huge speed increase when downloading a purchased app from the App Store when it had already been cached by the other caching server - as you would expect. After downloading about 15 different apps across my two OS X Mavericks Server instances, I check out the cached totals via the command line. Here’s what I got:
mavericks.pretendco.com - 10.1.125.120:
caching:TotalBytesFromPeers = 4957598
caching:TotalBytesFromOrigin = 15591778
Which equates to 4.96 MB from peers and 15.59 MB from itself.
replica.pretendco.com - 10.1.125.121:
caching:TotalBytesFromPeers = 17628454
caching:TotalBytesFromOrigin = 167213809
Which equates to 17.63 MB from peers and 167.21 MB from itself.
Note: Caching Server reports all its usage in the SI format, not the standard base 2 format, so make sure you factor that in to any calculations you may make.
Monitoring
Along with the original Caching Server, Caching Server 2 has a whole host of options to check the health of the service via the command line. Here’s a few commands you can use the ensure Caching Server 2 is alive and happy!
sudo serveradmin fullstatus caching | grep "Active"
This will return no if the service is in “STARTING” mode, and will not return anything if the service is in “STOPPED” mode.
sudo serveradmin fullstatus caching | grep "StartupStatus"
This should return “OK” if the service is running OK (d’uh, that’s obvious). If the service is in “STARTING” mode, this will return “PENDING”.
sudo serveradmin fullstatus caching | grep "CacheStatus"
This should return “OK” if the cache status is healthy. I’ve tried to break this to get it to return something other than OK but I haven’t been successful. Even deleting the entire /Library/Server/Caching directory doesn’t cause this to fail.
sudo serveradmin fullstatus caching | grep "CacheFree"
Theoretically Caching Server 2 should never let this dip down to anywhere near zero, but doesn’t mean you can’t monitor it.
sudo serveradmin fullstatus caching | grep "RegistrationStatus"
Typically this only equals 0 when Caching Server 2 has been started for the first time. While 0 (zero), the caching server is talking to Apple to get a GUID and register itself. This process generally takes no longer than two minutes, and will change to a 1 (one) once it has completed registration.
defaults read /Library/Server/Caching/Config/Config.plist LastRegOrFlush
This will tell you the last time Caching Server 2 checked in with Apple and retrieved an updated list of peers (and their status).
Finally, there’s a great debug log that is really verbose in what is happening during any stage of Caching Server’s life. The location of the log is /Library/Server/Caching/Logs/Debug.log, so tail -f it when you’re playing around to see what it does.
Hopefully this article has helped you get familiar with Caching Server 2 and set it up correctly.