OS X Mavericks Server - DNS
Running DNS services for your OS X Mavericks Server can be pretty easy as long as you know how. For a small network with a nice network setup, you shouldn’t have many complications with DNS. If you’ve been following my guides, the minimum you should have completed is the initial set up. It’s a good idea to have DNS all sorted before moving onto any of the other services, setting up DNS is typically one of the first things I would do if the server was to be the DNS server for the LAN.
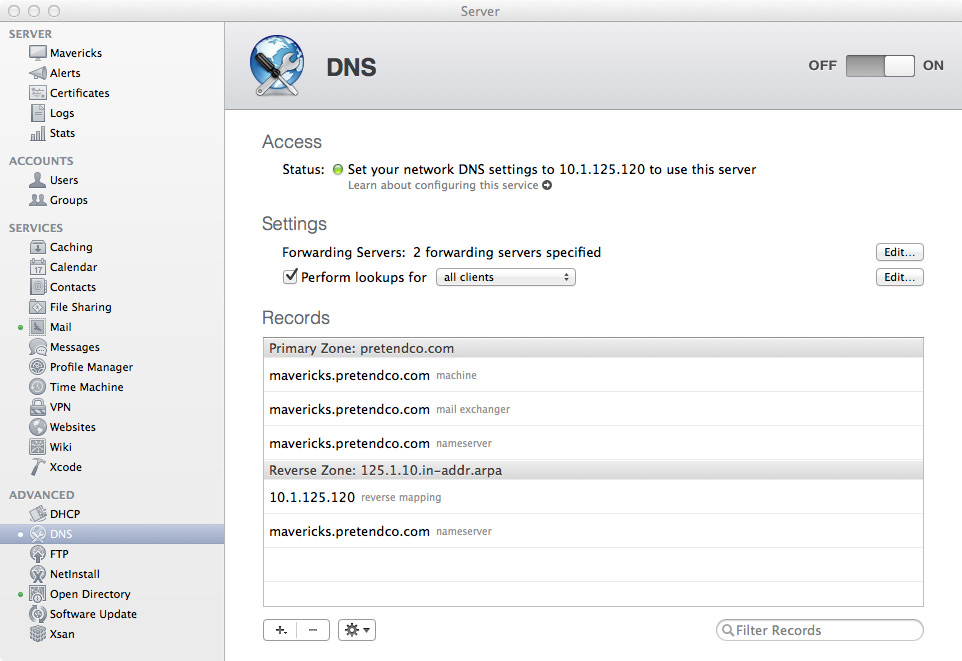
Go to the Server app and click on the DNS tab. It’ll look pretty empty when the service isn’t running. We’re going to change that. Click the On button to start the DNS services.
For the basic settings, we’ll configure forwarding servers, and what networks will be able to access this DNS server. If you click on the “Edit” button next to “Forwarding Servers:”, we can add the addresses for which this DNS will send queries to if it does not have the authority to do so.
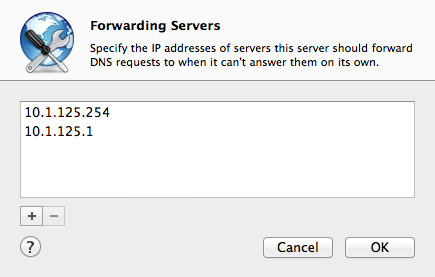
Depending on your modem or ISP configuration, this can vary. If your modem handles all DNS, all you need to enter is the IP address of your modem. Otherwise, if you want to pass on DNS queries to your ISP, you’ll need to enter the two IP addresses for your ISPs DNS servers. Lastly, you have the option of using public DNS servers, like Google’s. Google use 8.8.8.8 and 8.8.4.4 as primary and secondary DNS servers. I would usually use the ISP DNS servers, but it really depends on your network configuration. My advice is to ask your ISP on what details you should enter, they may have specific requirements depending on your internet connection method.
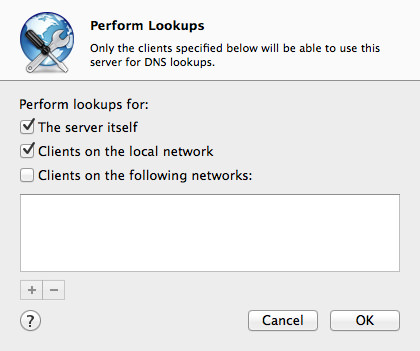
Given that we are setting up this server as the main DNS server for this network, keep “Perform lookups for” ticked, and select “all clients”. This should be the default, but change it if it’s not the default."
Next, we’re on to records. If you already have records, the DNS service has constructed them for you, if not, continue! Before we start configuring our own DNS records, click the gear in the bottom-left corner of the window and ensure “Show All Records” is ticked. Without that option ticked, it’s a little vague as to what you’re configuring.
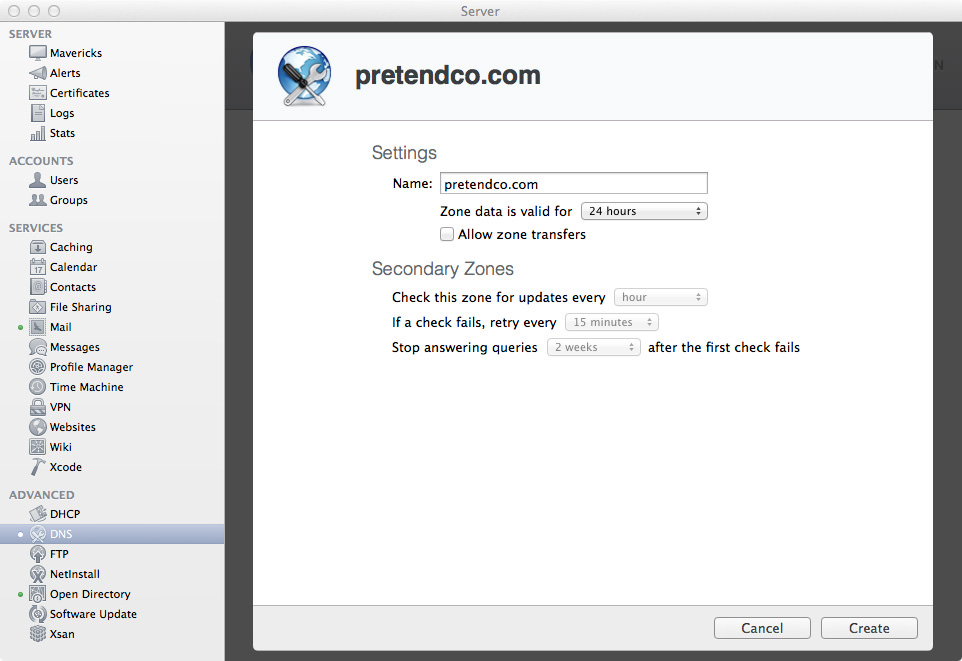
If you go to the + (plus) just next to the gear, the only two options you should have is “Add Primary Zone…” and “Add Secondary Zone…”. We’ll click “Add Primary Zone…”. Given that my domain name is pretendco.com, I’ll enter pretendco.com as the name for the Primary Zone. Next, change the “Zone data is valid for” to 6 hours. 6 hours is long enough for cached DNS values. Now, click OK.
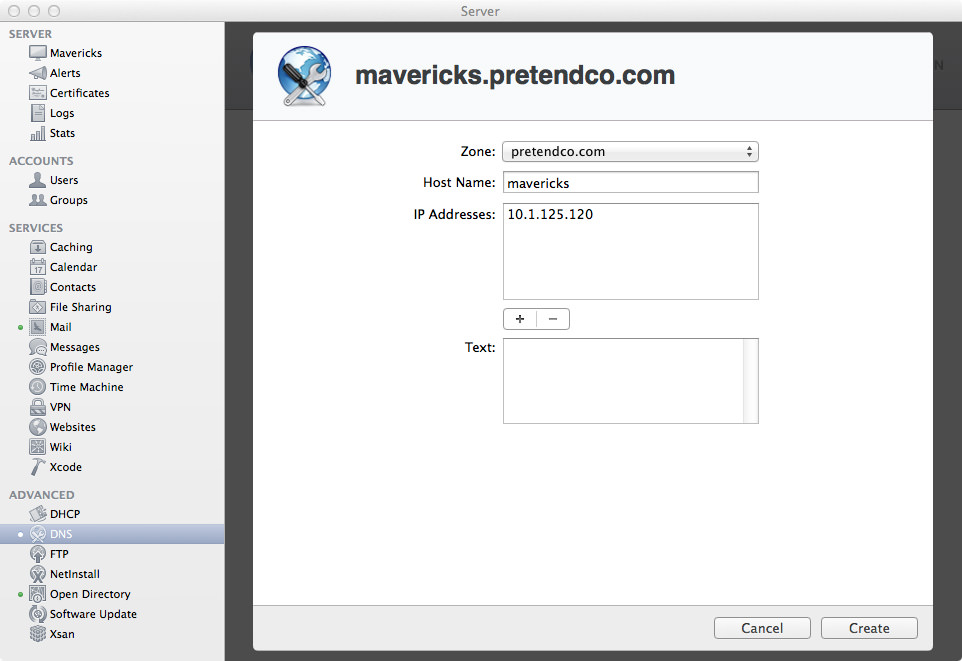
Wonderful, we now have a Primary DNS zone. It’s time to add an A record (or Machine record). What this essentially means is that you can assign an individual DNS name to an IP address on the network. Click on the + (plus) again, and click “Add Machine Record”. Keep the “Zone” as pretendco.com (or your zone name if it’s different). Given the subdomain (and name) of my server is mavericks, I’m going to make the Host Name mavericks. The “IP Address” should be the IP address of the server In my case, it’s 10.1.125.250. Now, click “Create”.
Superb, you now have a DNS name for your server and your domain name. Now you can do a DNS lookup to ensure it’s all working OK. Open up Terminal and enter (replace my IP address with your server’s IP address):
dig -x 10.1.125.120
This does a reverse lookup of the IP address and checks to see what DNS name is associated with that IP address. You should hopefully see something similar to below:
; <<>> DiG 9.8.3-P1 <<>> -x 10.1.125.120
;; global options: +cmd
;; Got answer:
;; ->>HEADER<<- opcode: QUERY, status: NOERROR, id: 27201
;; flags: qr aa rd ra; QUERY: 1, ANSWER: 1, AUTHORITY: 1, ADDITIONAL: 1

;; QUESTION SECTION:
;120.125.1.10.in-addr.arpa.	IN	PTR

;; ANSWER SECTION:
120.125.1.10.in-addr.arpa. 10800 IN	PTR	mavericks.pretendco.com.

;; AUTHORITY SECTION:
125.1.10.in-addr.arpa.	10800	IN	NS	mavericks.pretendco.com.

;; ADDITIONAL SECTION:
mavericks.pretendco.com. 10800	IN	A	10.1.125.120

;; Query time: 0 msec
;; SERVER: 127.0.0.1#53(127.0.0.1)
;; WHEN: Tue Oct  8 21:03:19 2013
;; MSG SIZE  rcvd: 110
Essentially, what this says is:
- QUESTION: I’m asking what the DNS name of
10.1.125.120is - ANSWER: The DNS name is
mavericks.pretendco.com - AUTHORITY: This is the DNS name of the Nameserver that answered our query
- ADDITIONAL: This shows you the IP address of the Nameserver that answered the query
- SERVER: The IP address of the DNS server that responded to the query.
If you ran this command on the server, the server that responded should be 127.0.0.1 (aka localhost). If not, you probably don’t have the first DNS server for your network interface as 127.0.0.1. Add that in before you continue.
Finally, we need to add an MX (Mail Exchanger) record for the server, so you can send email. To do this, click on the + (plus) at the bottom-left, then click “Add Mail Exchanger Record…”.
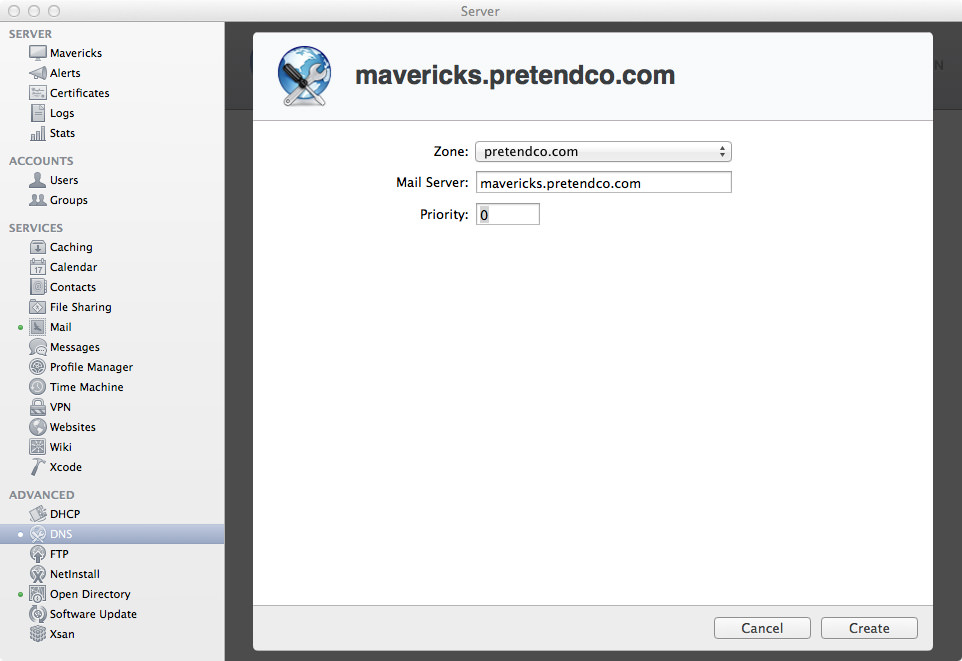
For your zone, leave it as the default. For “Mail Server”, it should be the host name for the server you’re using. For example, the host name for my server is mavericks.pretendco.com, so that’s what I’ll enter. For “Priority”, if you have one mail server, enter 0. The priority (or weighting) is used for if you have multiple Mail servers and want to spread the load. The closer number to 0 the server is, the higher priority it is. I’ve only scraped the surface of Mail server priority, it’s worth reading up properly for more technical information. Now you’re ready to click “Create”. So click it.
Your DNS configuration is now done! Naturally, more complex environments will require for DNS configuration, but if you’ve just got one server, this should be all you need to do.