OS X Mavericks Server - Adding New Users
Adding users to your server is probably going to be something you will end up doing the most once the server has been configured, so it’s important that you’re doing right. Personally I’ve found to be the most valuable tip when creating users is to… keep it consistent! I’ve been brought into far too many environments when the shortnames, email addresses and even names are inconsistent. Personally, it drives me nuts and can cause confusion between staff about what their username is.
Contents
- SACLs
- User Templates
Before we start, here’s my style guide:
- Name: Firstname Surname
- Shortname: fsurname
- Email: fsurname@pretendco.com
You’d think it’s pretty basic and obvious, but you’d be surprised how many people forgo style and consistency. Now, how about we get to creating users.
Open the Server app and go to the “Users” tab. If you’re using Open Directory (which you should be!), ensure you’re looking at “Local Network Users”. You’d hate to add users to the server, only to find that you’ve added them to the local domain, rather than the Local Network Domain (Your Open Directory domain). So far, you should only see the Directory Administrator user. Let’s change that. Click the + (plus) in the bottom-left corner to add a user!
- Full Name: the full name of the user you’re adding. This is required, but does not have to be unique. While your Mac will require unique Full Names, Open Directory will allow you to have multiple users with the same Full Name.
- Short Name: the shortname of the user you’re adding. This is also required, and must be unique. You will not be able to add more than one user with the same shortname, so if you have two people with the shortname
jhalpert, consider having a counter at the end of the shortname, e.g.jhalpert,jhalpert2,jhalpert3and so on. I opt to have the first user with no number because you may not always know if someone with the same shortname will be added the server, so it just looks neater to have no numbers on the end of the first shortname. - Email: the email for the user. This field isn’t required, and you can use it even if your server isn’t running Mail services. It’s purely cosmetic, and is used for the global address list in the Open Directory domain. Note: if you do use this field, but enter a different username and are running Mail on the server you must add an alias for that shortname, if you have
jhalpertas the user shortname, butjimas the email username, Jim won’t receive email tojimuntil that name has been entered as an alias (coming up soon). - Password & Verify: enter the users password twice. Best to generate a password, save it to a Numbers document then distribute the password to each user. Otherwise, set a generic one then require them to change password on next login.
- Allow user to administer this server: having this checked enables the user to successfully authenticate and have full authorisation for the Server app. Use it wisely.
- Home Folder: I absolutely despise networked home folders, they screw up so often and are very hard to fix (sometimes impossible to fix). I will always change this to
None - Services Only. Takes up less space on the server too, as it doesn’t generate a home folder in/Users. - Keywords: Add keywords for your user. This field is not required, and acts as a tag field for the user. It’s new to the GUI for Mavericks Server. I have yet to see a solid use case for this field, but I’m sure someone is using it to the full effect.
- Notes: Add notes for the user. Like keywords, this field is optional, and again, I’ve yet to see a good use for this field.
Given that I love the hit TV show The Office (US) (P.S. I really love the UK original too), I’m going to use fake users that are named after main characters from the show. My first user will be Jim Halpert. Following the style guide as above, you’ll be entering something like this:
- Full Name: Jim Halpert
- Account Name: jhalpert
- Email: jhalpert@pretendco.com
- Password: a random password of your choice (for this example, I just did pam)
- Home Folder: None - Services Only
- Keywords: sales
- Notes: Often plays pranks on Dwight.
Note: In reality, keywords and notes aren’t important to the functionality of OS X Server and Open Directory, it can help with usability, however. Note that adding the keyword sales won’t add them to a group called sales. Keywords are purely for easy searching.
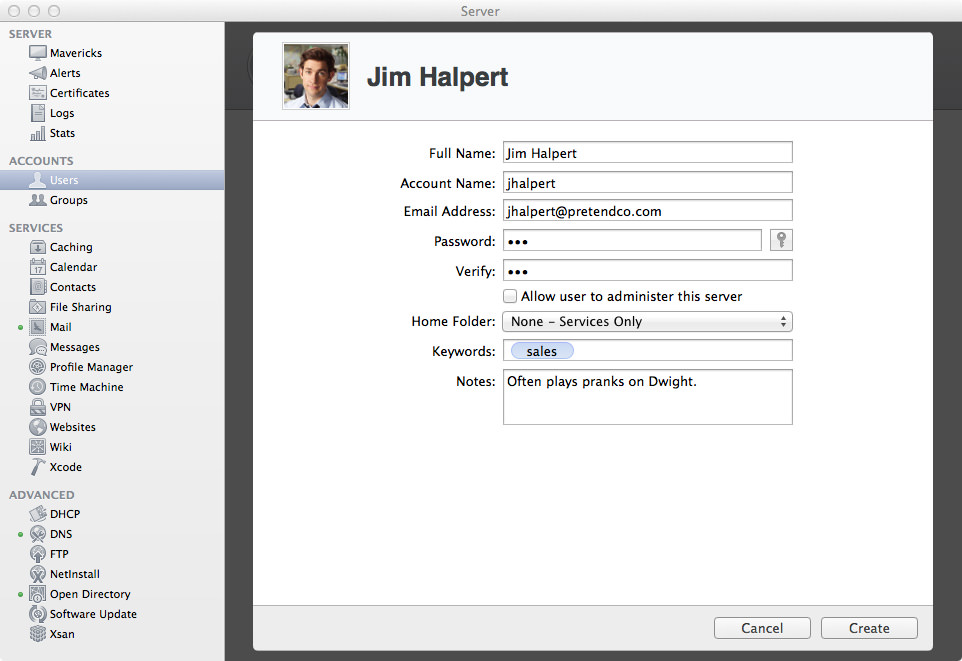
I’ve also added a picture for Jim, I suspect most people don’t realise you can drag and drop and image file onto the generic user picture to add a picture for that person.
Once you’ve added those details, click “Create” to add the user! If there’s any errors, you’ll be notified and the window won’t change, otherwise, you should be redirected back to the Users list (with your new user in the list!)
SACLs
A handy feature in the Server app is the ability to restrict specific users to specific services. For example, you might say that newer employees are not allowed access to the VPN service, or maybe you want a shared account that only has access to File Sharing or collaboration services.
First off, what is a SACL? SACL stands for Service Access Control List, which, as the name would suggest, are lists that define user and group access to each service in OS X Mavericks Server. The lists themselves aren’t necessarily files in OS X, they’re memberships to specific groups in the local directory. For example, the service Contacts is actually a membership to the group com.apple.access_addressbook.
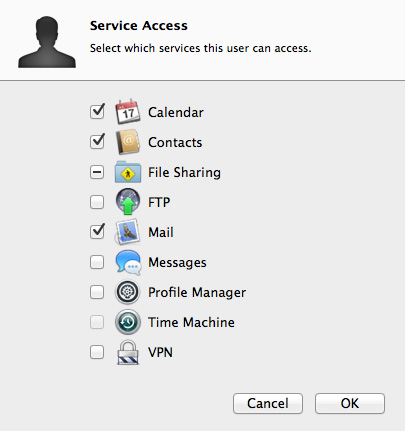
By default, all users are allowed access to all services. To change a specific users access to a group, you can do one of two things. The first option is to right click on the user (in the Users list) and then click “Edit Access to Services…”. You’ll be shown a list of the most common services (note: not all the services), where you can uncheck each box you don’t want the user to have access too.
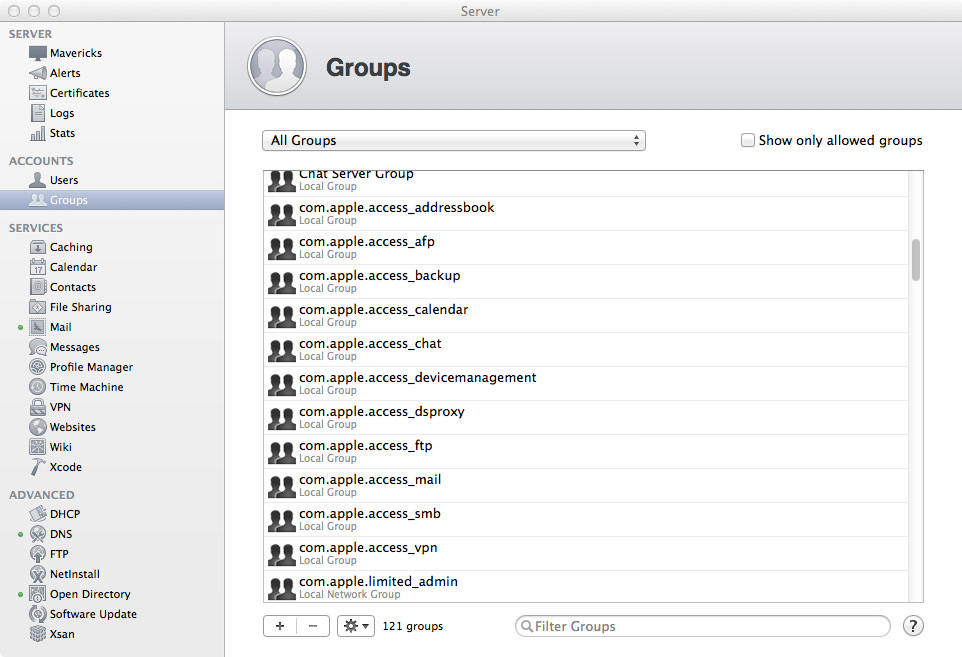
Alternatively, you can go to the Groups section of the Server app and change the membership there. First off, you’ll have to enable to option to see system accounts, as they are hidden by default. Go up to View, then click on “Show System Accounts”. Now you’ll see a huge list of accounts, lots with interesting names. Scroll down until you get to the groups starting with com.apple.access_. If you open up those groups, you can add and remove members from there. Otherwise, you can go to the user in the Users section of the Server app and add or remove group memberships from there.
User Templates
New in OS X Mavericks Server is the ability to add users that conform to a specified template. You might decide that most users only need access to AFP, Contacts, Calendars, and Mail. You also decide that they won’t have a home folder (services only) on the server and cannot administer the server. To make a template, go to the Users section in Server app, then click the gear in the bottom-left corner and click on the “Edit Templates…” button.
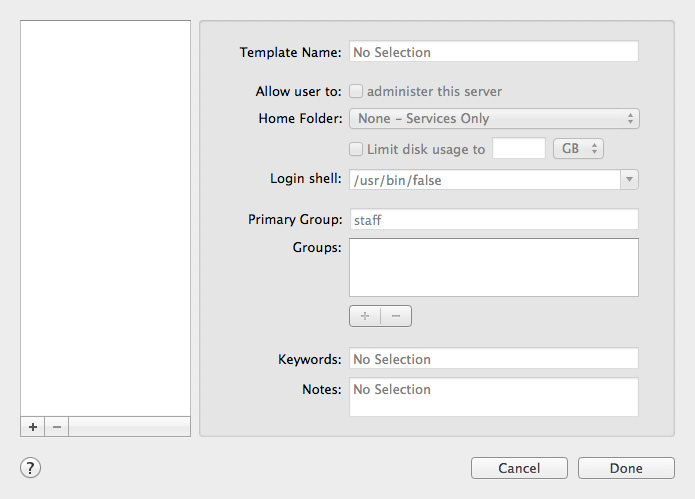
Hit the plus to create a new template! I’m going to call mine Standard Sales User as I want to use it for all standard sales people.
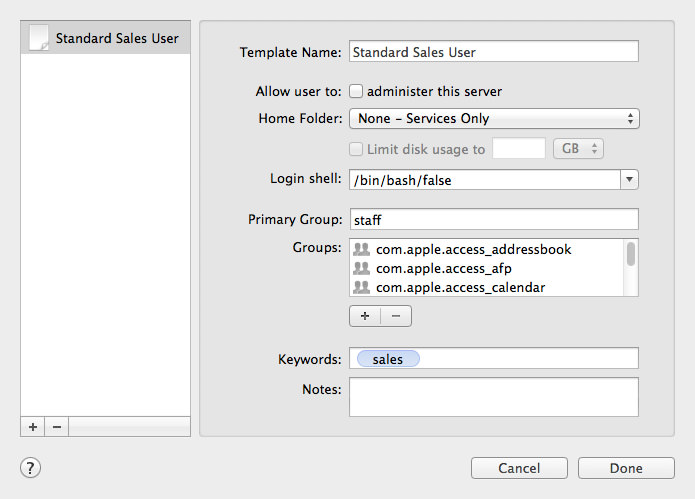
Next, I’m going to ensure that “administer this server” is unticked, because standard sales users shouldn’t be allowed to modify the server in any way! Next, change home folder to “None - Services Only”. Then, change Login shell to “/bin/bash/false” (the default for OS X Mavericks Server).
Leave the Primary Group as staff, you don’t want to mess with that as the user may never be able to log in. Next up, with groups we can utilise what we learnt with SACLs to restrict what groups (and services) they have access too. As with all users, I’ll put them in the default “Workgroup” group, but we’ll also add them to a few other groups. As I mentioned, I want to restrict these users to only having access to several services. These services are AFP, Contacts, Calendars and Mail. Click the + (plus) for adding groups, and enter the following groups: com.apple.access_afp, com.apple.access_addressbook, com.apple.access_calendar and com.apple.access_mail.
If you want to add or remove any other services, refer to the list below which has the service name and group name for the Services in OS X Mavericks Server.
- Contacts —
com.apple.access_addressbook - AFP —
com.apple.access_afp - Time Machine —
com.apple.access_backup - Calendar —
com.apple.access_calendar - iMessage —
com.apple.access_chat - Profile Manager —
com.apple.access_devicemanagement - FTP —
com.apple.access_ftp - Mail —
com.apple.access_mail - RADIUS —
com.apple.access_radius - SMB —
com.apple.access_smb - VPN —
com.apple.access_vpn
Finally, you can add keywords and notes for the user template. I’m just going to add sales for a keyword, and that’s it. Finally, click “Done” to add the template. Now to test out the template!
You’ll now notice that when you go to add a new user, at the top of the form you’ll have a new field called “Template” that has a drop-down menu of all your templates! I’m going to enter a fake account for a user called John Citizen. Check the image below for my configuration:

Now, click “Create” to create the user from the specified “Standard Sales User” template. Once the user has been created, right-click on the user then click “Edit Access to Services…”. This will bring a window that shows you all the services John Citizen is a member for. As you’ll see, all the services we entered above are ticked (with exception for File Sharing, as that combines AFP and SMB).
Excellent, John has the right privileges and is associated with the right groups, all thanks to our user template! I believe at this stage the User Template system is still in its infancy, but could grow to become a really powerful tool. I’d love to see the ability to customise the way it grabs the full name and brings that across to short name and email address.